Clubs
Create a club in Schoolcomms
Within Schoolcomms there are two types of clubs that can be created. Individual booking clubs where attendance patterns can change, often most appropriate for Breakfast and After School Clubs. Or Enrichment style clubs, where a block booking must be made, often most appropriate for termly activity clubs. The steps below will talk through how to create both styles of club.
To initially create a club is simple. All you have to do is:
- Within Schoolcomms click into Clubs on the left-hand side of the screen.
- Click Create Club on the left-hand side of the screen.
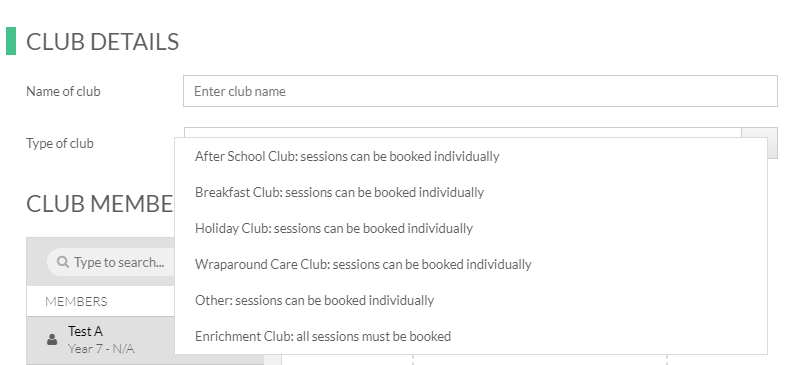
- Name the club and select the type of club you would like to create from the drop down list.
- Finally select the school members you would like to make the club available to by selecting the individual members or whole groups on the left-hand side, and then click Add to add them into the Club.
- Click Save in the right-hand corner to save your Club.

Create and Remove sessions for Clubs
Create sessions
The next step is to create club sessions, so that Schoolcomms know when you would like the club to run.
- In the Active club list on the left-hand side of the screen, select the club you wish to create sessions for.
- Click the Create First session box in the middle of the screen or Create Sessions button on the right-hand side.
- You will be taken to the Calendar page.
- At the top of the screen choose the date range that your club will be running between.
- Highlight the dates the club is running on by clicking on the individual squares, or by clicking the word ‘Wednesday’ if the clubs runs every Wednesday, for example.
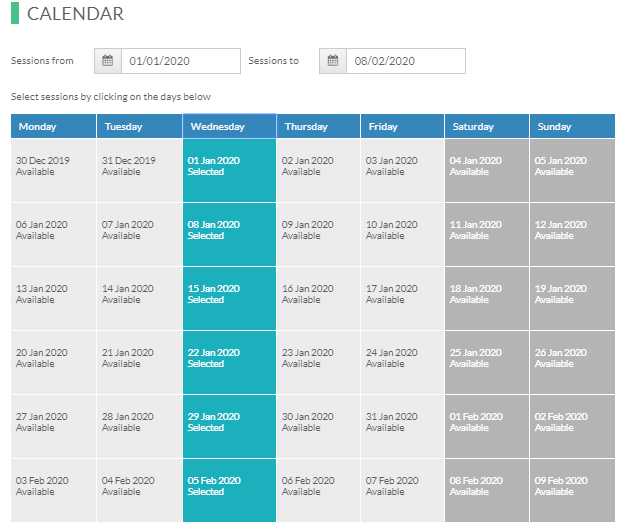
- Check the selected dates and deselect any dates which the club won’t be running on e.g. bank holidays or half terms.
- When you are happy with the sessions chosen, click Save in the top right-hand corner.

Removing Sessions
There may be times when you need to remove sessions for an existing club, possibly in times of emergency school closures or club cancellation due to poor weather.
- In the Clubs list choose the club you want to edit/remove sessions for and click the Manage Sessions button
- This screen will show a list of any existing sessions
- To remove a session, click a session in the sessions list and click on the grid in the top right hand corner. Select Remove Session from the right-hand menu.
Removing a session from a Club will cancel all booking and apply a credit to the child’s balance for that Club.
Please be aware that, for Enrichment Clubs, the balance will not be credited automatically when a session is cancelled; this would need to be manually applied via record charges.
Manage club booking choices and/or charges
You will need to tell Schoolcomms if your club is chargeable or if it has different booking options.
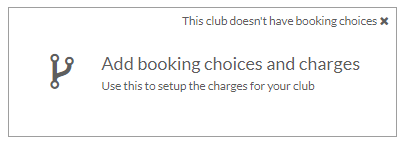
- Within the Clubs screen select the club from the list on the left-hand side of the screen, and then click in to the Add booking choices and charges box in the middle of the screen.
Individual Booking Clubs
- You will see the Booking Choices section where you can tell Schoolcomms if your club has any Charges/Booking Choices. These may be options you would like your parents to choose from when booking their child in to a club, e.g. 3-4pm session costing £5.00 or 3-5pm session costing £7.50.
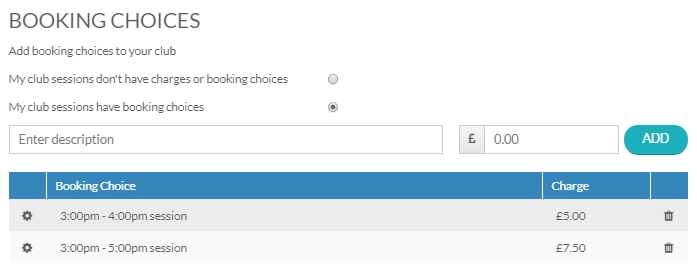
- You can select from My club doesn’t have booking choices or My club has booking choices. If you select the option to have booking choices you will be able to add a description and charge for as many booking choices as you have.
- When you are happy with the charge and booking choices, click Save in the top right-hand corner of the screen.
Enrichment Style/Block Booking Clubs
- You will see the Charge section, where you can select My club doesn’t have a charge or My club has a charge.
- If you select the chargeable option you will be able to enter the charge for the club. This is the charge that applies to the entire club and is not a daily price, e.g. £30 for the half term.
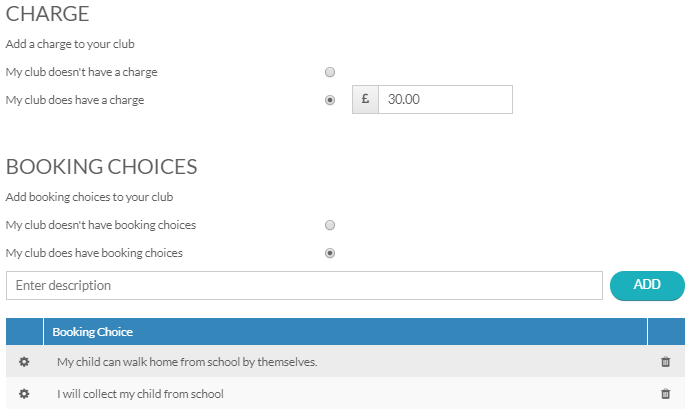
- Next you can tell Schoolcomms if your club has any Booking Choices. These may be options you would like your parents to choose from when booking their child in to a club, e.g. snack type/collection arrangements.
- You can select from My club doesn’t have booking choices or My club has booking choices. If you select the option to have booking choices you will be able to add a description for as many booking choices as you have.
- When you are happy with the charge and booking choices, click Save in the top right-hand corner of the screen.
Book school members onto a session
When you have created the clubs sessions and the booking/charge choices you are ready to start booking students onto the club sessions
- In the Clubs list select the club you wish to make the bookings for.
- Click the Book members onto sessions button on the right-hand side of the screen.
- Select the School Members you want to book onto sessions.
- Select the booking choice appropriate for this booking. If there are no booking choices then proceed to next step.
- Choose the sessions you would like to book the School Members into.
- Click Book on the right-hand side.

Club Payments
Create a Clubs Payment Request
- To create a new payment request for a club firstly ensure you are within the Clubs section of Schoolcomms.
- Select the relevant club from the list of clubs on the left-hand side of the screen.
- Click Create Payment Request on the right-hand side of the screen. This will open a new Payment Request form for you.
- The system will automatically give the payment request the same name as the club and will automatically link the payment request to the correct club for you.
- In the Type of Payment field, make sure you select either Clubs Flex: Can be paid more than once or Clubs Fixed: Can only be paid once.
- Fill in the details remaining details for the payment request
 Confirm that all the members included in the payment request are correct.
 - Click Save on the right-hand side to create the payment request.

Record Charges for your Club
Once your Club has been created, and before you make it visible to your parents, you may wish to record/transfer a balance if you have already been taking money outside of Schoolcomms for your Club or you are creating a new Club:
- Log into Schoolcomms and click on Clubs.
- Once you are in Dinners/Clubs, click on Record Charges from the menu on the left-hand side of your screen.
- Select the Club you want to record the charge for from the list on the left-hand side of the screen.
- Under the member’s name you wish to record an amount for, click in the No Action box.
- Select if you wish to record a credit (positive balance) or a charge (negative balance).
- Add the amount of the balance into the amount box.
(It is not necessary to apply + or – when applying a credit or a charge) - Repeat this process until you have added/amended all the balances you need to.
Once you are happy, click Apply Actions on the top right corner and this will save the changes and update the balances for Clubs in Schoolcomms and in School Gateway.
Club Reports
Within your Clubs system you have a series of reports which will help you manage your clubs and keep track of the balance.
Below is a list of the reports that you will be able to access and a brief outline of what they contain.
- Log into Schoolcomms and click on Clubs > Club Reports.
- Once you are in Clubs selectClub Reports from the left-hand side menu.This will bring up a list of the reports and a description of each report is listed alongside the report name to help you distinguish which report you need.The reports include:
- Today’s attendance– This will display who is booked onto today’s club session and if they have attended provided you are recording the attendance in the club.
- Club balances– This report will list the balances for all members and all clubs.
- Club transactions– This report will list all the credits and charges for your club.
- Club usage– This report will display usage statistics and attendance information for your clubs.
- Club member summary –This report will display all the sessions a member is booked onto across all their clubs.
- Audit trail – This report will list all the club actions carried out by each Schoolcomms
- Click on the report you wish to view.
- To filter on a column, click the Filter icon within the column header and select the drop-down arrow.
- To save a report select Export or you can print the report by selecting Print in the top right corner.
Cancel or edit bookings
Cancel or edit bookings within a session
There may be times where you need to cancel or amend a club booking for a student.
Cancellations and amendments can either be made within school or by parents if you’ve chosen to enable cancellations and changes for them. If you haven’t enabled this option for parents and would like to do so, you can do this from the School Gateway Settings page of the Club. Steps on how to do this are available below within ‘How to set what parents can see and do in School Gateway’.
To cancel or amend a booking within school, please follow the steps below:
- In the clubs list select the club you wish to cancel or edit a student’s booking for and then click the Manage sessions button on the right-hand side
- Select the session you wish to cancel or edit a booking for
- Find the School Member you are looking for in the list
- If you want to change the booking choice, click the pencil icon next to the booking choice
- If you want to remove the school member from the session, click the dustbin icon next to the school member
Please note: By cancelling a booking for a child, the system then makes the session available for another child to book. Please monitor this closely, as if the club is an Enrichment club, you may have a child booked on to one session who isn’t booked into any of the others.
Record Attendance for a Club
Recording attendance for a club will not affect the pupil’s balance.
You would need to remove the pupil from the session to remove the charge: Remove a member from a club session
Record Attendance
- Within Clubs select the Club you need to record attendance for, and click Manage Sessions on the right-hand menu.
- Within Manage Sessions click on the session you require on the left-hand side of the screen.
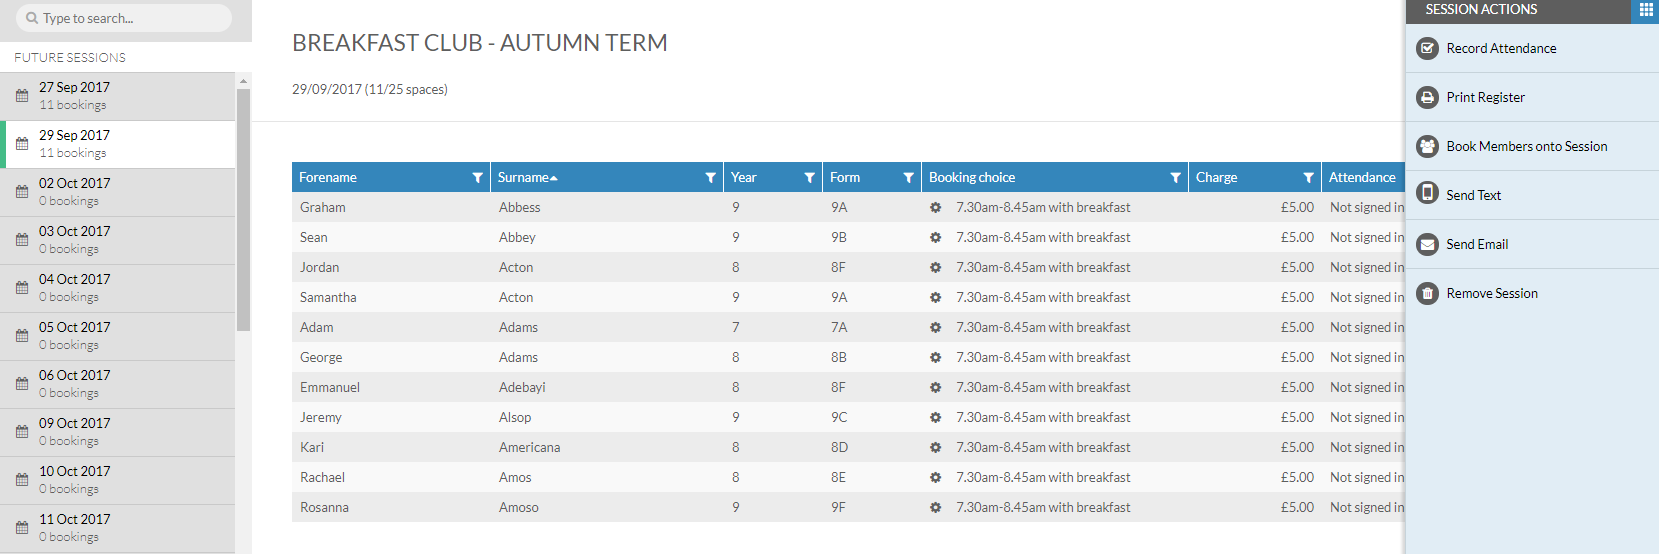
- You will see a list of students who are booked in to that session.
- Click Record Attendance at the top of the screen. A second screen will pop up, giving you the ability to mark each child as Present, Late or Absent.
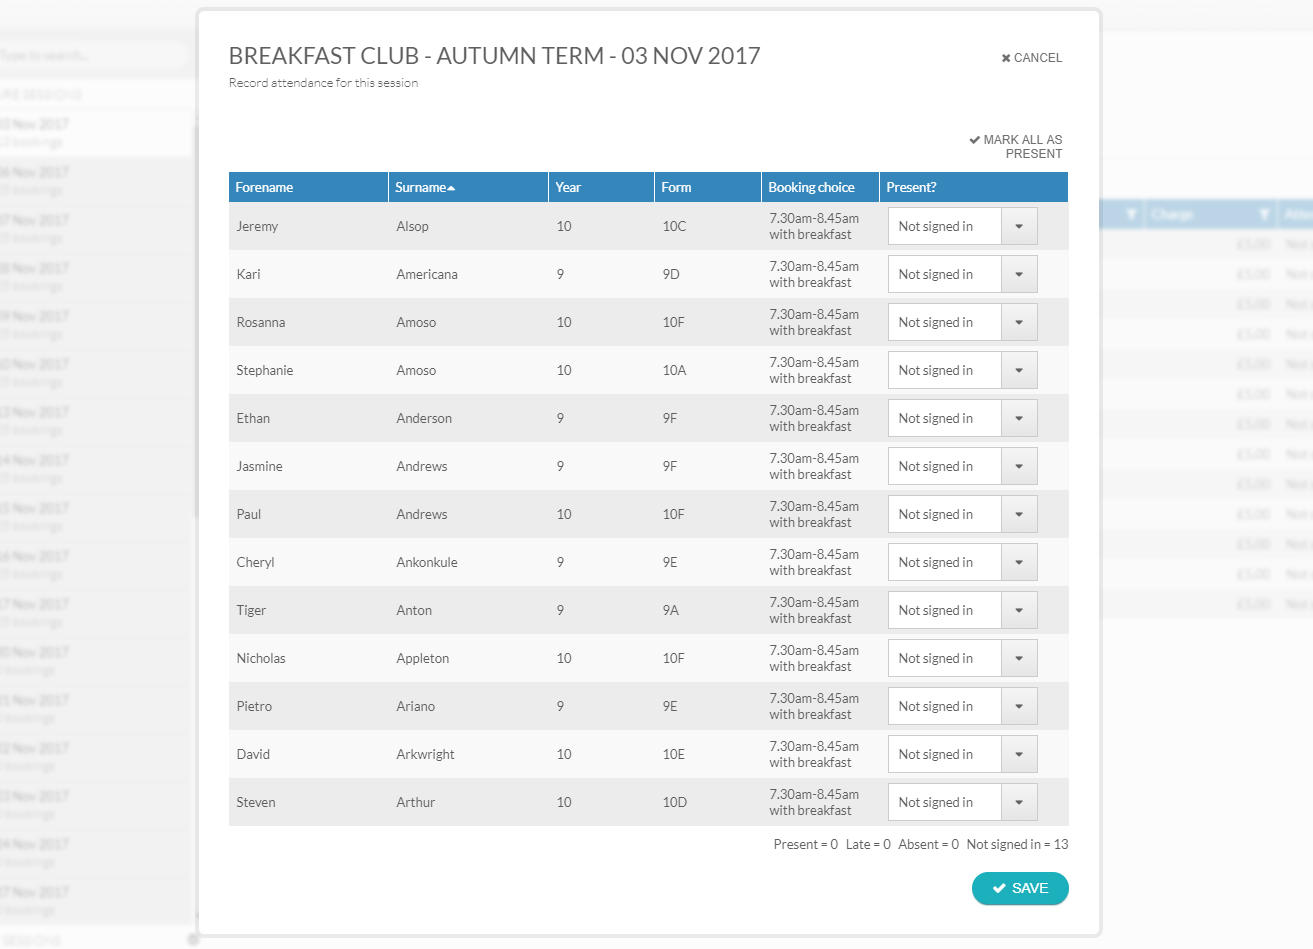
- Once finished click Save.
Print a club register
- Before a session starts you may want to print off a register to record attendance.
- On the club list select the club you wish to print a register for and then press the Manage sessions button on the right-hand side.
- On the list of sessions click the session you wish to print a register for.
- You can filter the bookings, using the filter icon in the column headers to find the bookings you wish to print.
- Click the Print register button at the top of the screen.
- A PDF register will then open in a new window which you can print.
How to set what parents can see and do in School Gateway
You will need to tell Schoolcomms how you would like it to handle bookings and payments for a club, as well as if the club has a limited number of places.
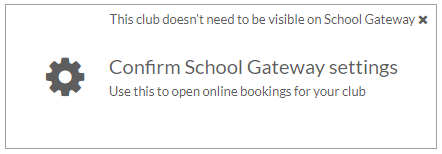
- Within the Clubs screen select the club from the list on the left-hand side of the screen, and then click in to the Confirm School Gateway settings box in the middle of the screen.
Individual Booking Clubs
- Firstly, you will see Visibility Settings where you can choose whether you want parents/staff to view sessions on School Gateway.
- If you choose Yes to either, then Online booking options are selectable. Here you can choose whether parents/staff can book sessions on School Gateway and when the individual session bookings can be made until.
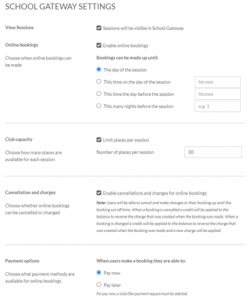
- If you have chosen Yes to parents/staff booking online, then Club capacity is selectable, and you can choose to limit the number of available places on each session.
- You are then able to choose if you would like parents to be able to cancel or change their own bookings, via School Gateway. If you tick the box to Enable cancellations and changes for online bookings parents will be able to cancel or amend their bookings up until the bookings cut off point selected above. If you choose not to enable this feature, booking amendments and cancellations will need to be made internally by a member of staff.
- You can then choose if you want the parents to pay when they book select Pay Now or book and then pay later select Pay Later. When paying later the cost of the bookings will be reflected within the child’s club balance.
Please note: The Pay Now feature will only work when the payment request type is Clubs flexible: can be paid more than once.
Enrichment Style/Block Booking Clubs
- Firstly you will see Visibility Settings where you can choose whether you want parents/staff to view sessions on School Gateway.
- If you choose Yes to either, then Online booking options are selectable. Here you can choose whether parents/staff can book the club on School Gateway and the date and time the entire club can be booked up until.
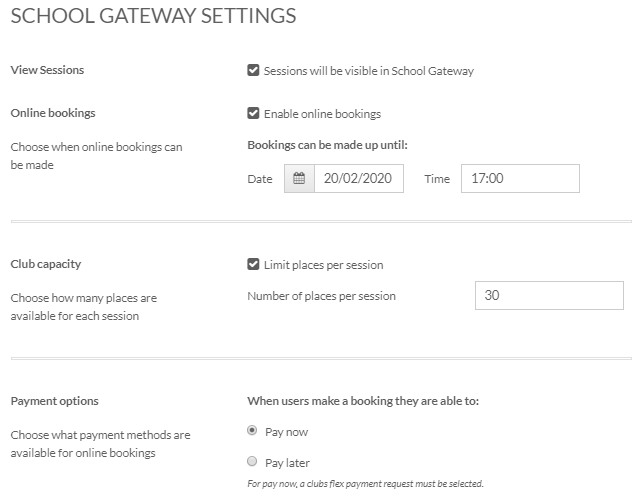
- If you have chosen Yes to parents/staff booking online, then Club capacity is selectable and you can choose to limit the number of available places on each session.
- You can then choose if you want the parents to pay when they book select Pay Now or book and then pay later select Pay Later. When paying later the cost of the bookings will be reflected within the child’s club balance.
Please note: the Pay Now feature will only work when the payment request type is Clubs flexible: can be paid more than once.
To view how parents cancel or amend bookings please click here
De-activate a Club
To make a club inactive:
- Go to Clubs
- Select the Club you want to make inactive (ensure you select the correct club as once the Club is made inactive it can’t be re-instated, you will still have access to the Club reports)
- Click on Deactivate
The Club will then show under inactive.
Sending a message about your club
Once your club is created you may want to send a message to the parents or your club members regarding the club.
Send Message
- Once you have selected the club you want to send a message about, click on Send Message from the right hand side menu.
- You will automatically land on Send a Text please select Send an Email if you want to send an email from the tab at the top of the screen.
- Choose who you want to send your message to.
- Select which members of the club you want to send a message to.
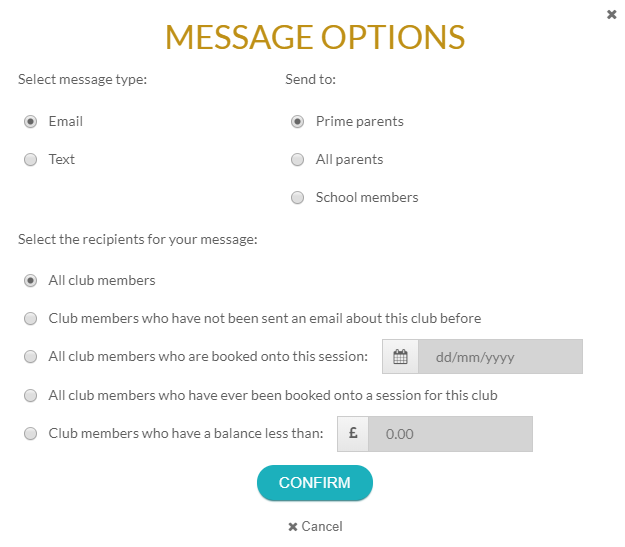
- When you click return it will bring you to the Messaging screen, from here you can type in your message and if you are sending an email you can add an attachment. If want to amend the recipients of the email you can do so from this screen by clicking on the + to view the list of recipients and then clicking on the x next to the name you wish to remove or adding a name from the left-hand selection.
- Write your message, you can use the wild cards if you wish by clicking on the Merge fields. There are some wild cards specific to clubs for you to use if you wish. When you are happy click send or send later and your message is complete.
- See sent items in Messaging/ Sent Items to view the delivery/dispatch status of this message.