Import Management for Non SIMS Schools
Changing from SIMS to a new MIS, what happens
When you change from SIMS to a different MIS we need to create a new Schoolcomms account for you.
This means:
- You will have new log-in details for Schoolcomms.
- You will have a new inbound number, which will need to be communicated to parents.
- You will need to recreate Payment Requests, Clubs and Schoolcomms Dinners (depending on your licence) in the new Schoolcomms account and manually move any existing payments from the old account to the new one.
Import school members in to Schoolcomms
All School Members (pupils and staff) will need to be entered into a CSV file and imported in to Schoolcomms.
Part 1: Complete the following information on the spreadsheet we have sent you:
- The field types are as follows:
Field# 1 Student admission number / unique identifier Field# 2 Forename Field# 3 Surname Field# 4 Registration group Field# 5 School year Field# 6 Role ID (See the role types table) - The role types are as follows:
School member type Role ID Student 1 Teacher 2 Support Staff 3 Governor 4 School board member 5 Other 6 - Remove the column headers, the top line, from the spreadsheet

- Save the Excel sheet with the following file type: ‘CSV (Comma delimited) (*.csv)’
Part 2:
- Log in to Schoolcomms and go to the Management tab.

- Click on Browse and select the CSV file you saved earlier.
- When the file name is showing click on Run Import to bring the data into Schoolcomms.
Add/remove school members and changing details
If you need to make any changes to the details for a School Member (such as their registration group) or you need to add or remove a member you will need to update your CSV file and re-import it in to Schoolcomms.
Once you have updated your spreadsheet re-import the new data.
If you have removed a member you can now delete them from Schoolcomms.
Link parent to child and add contact details
You will need to individually add each parent along with their email address and mobile manually into Schoolcomms, following the steps below.
-
- Click on School Gateway from the bottom of the left-hand menu.
- Select the School Members Tab, you may need to press the 3 lines in the top left for this to appear.
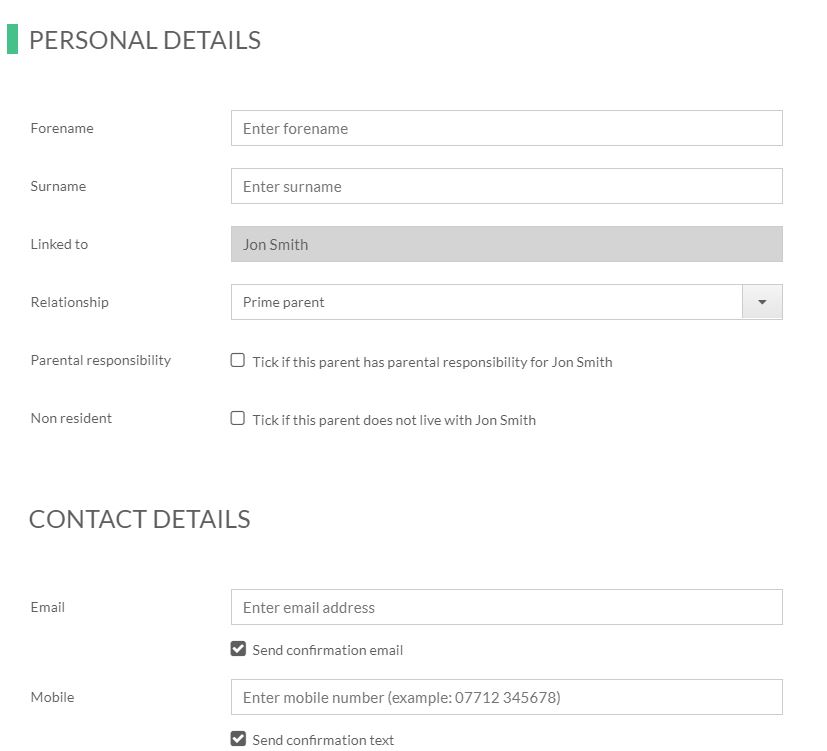
- Select the child you want to add the contact for, click on Add Linked Person to add the contact details for the first parent.

- Complete the personal details for the parent.
- Select the Relationship you want for the parent.
- Tick if the parent has Parental Responsibility.
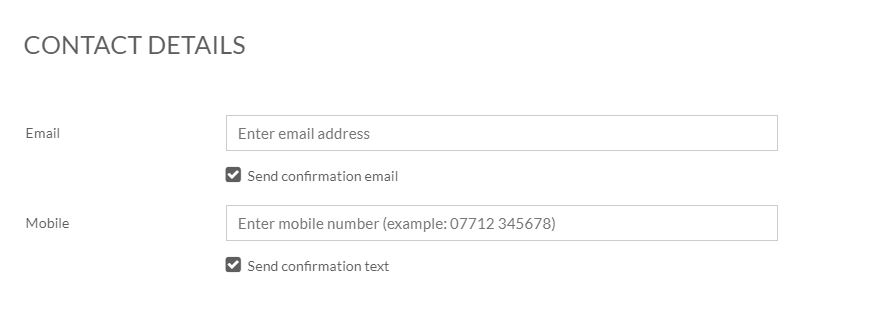
- Add the contact details and choose if you want to send a confirmation email or text to the parents. Click Save.
- If you want to add an additional contact, click Add Linked Person from the right-hand side menu and repeat steps 5-8 above.
- Any changes to these linked people will also need to be done here by clicking edit from the right-hand side menu
Add contact details for staff members
You will need to individually add the email addresses and mobile numbers manually into Schoolcomms, following the steps below.
- Click on School Gateway from the left-hand menu.
- Select the Management Tab.
- Click on School members.
- Select the member of staff, click on Add Linked Person to add the contact details for this member.
- Add the email address and mobile number.
- Choose if you want to send a confirmation email or text.
- Click Save
Create Additional Users
Premium Licence holders are able to have Unlimited Schoolcomms Logins. You can create new Schoolcomms users if you are the schools Multi-User Administrator from Management – Dashboard – User Accounts
Add a New Schoolcomms user
To add a user select Add New User Account and then fill in the details.
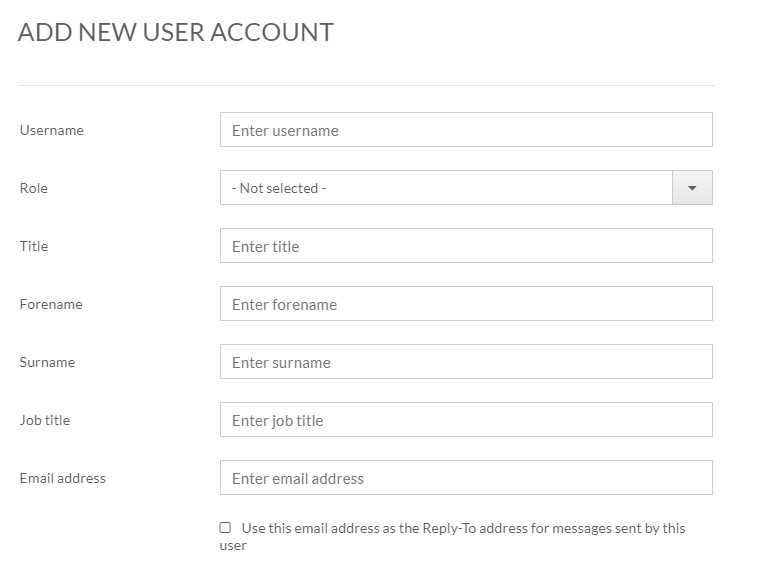
You will need to select a permission group, these groups decide what this user is able to see/do in Schoolcomms.
View the latest User Permissions guide here
Once you are happy with the details press save on the top right-hand corner.
Hint: In this window there is a check box that reads “Use this email address as the reply to address sent from the compose email screen by this user”. If you tick this, then any replies to any email this user sends out in Schoolcomms will be delivered to their own email address provided on this screen.
Memorable data will then appear for the user you have created, please write this down so you can pass this on to the user.
The users’ password will be emailed to them using the email you provided.
What do I need to do for the start of a new academic year?
At the end of the academic year / beginning of the new academic year you will need to update and re-import your spreadsheet (CSV file). You will need to remove any leavers and add any new members. All the registration groups and year groups of existing school members will need to be updated to reflect the new academic year. Once the spreadsheet is updated you will need to re-import this into Schoolcomms.
You can then delete any leavers when you no longer wish to have any further contact with them.
Deleting school leavers
If you have removed a member from the re-imported CSV file, they will show in the task list area and you will see the following message.
![]()
Click on the Icon and select the members you want to remove by clicking on the name on the left, click Add in the middle so the name appears in the right. Click OK at the bottom of the screen to permanently remove them from Schoolcomms.
