Managing your data
If you are new to Schoolcomms the information below will guide you through some steps to complete ahead of your go live date.
Data issues and deleting leavers
Data issues are areas in your contact data that Schoolcomms has highlighted an issue with. Most commonly this is based around the contact details held in Schoolcomms, but data issues also flag up any other errors the system may have found after an import.
When viewing your data issues, the error column will give details of the data issue. This list can be both filtered and saved.
You can find your data issues in Schoolcomms by going to: Dashboard, Management Report, Import Data Issues.
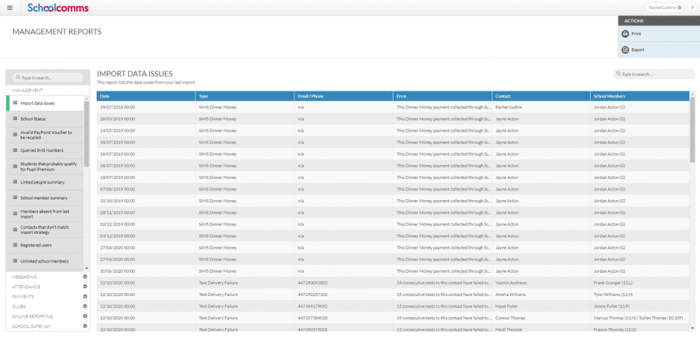
Data Issues include:
Permanent Bounce – At least three emails to this address have failed to be delivered. This could be because; the email is no longer active, or there is something stopping emails getting through on the contact’s side. Check with the contact that this email is still valid, if so you should ask the contact to add your Schoolcomms email address to their safe senders list on their email account. In order for them to receive emails again you will need to re-enable their contact details from the linked people screen.
SPAM – your contact has marked your email address as SPAM or junk, blocking the email address. Check with the contact that they want to receive your emails – if they do you need to re-enable their email address in the linked people screen. If this happens again, ask your contact to add your Schoolcomms email address to your safe senders list.
Text delivery failure – This means that the last three or more text messages you have sent to this contact failed to be delivered. Most commonly this is because the number is incorrect or invalid. Add the correct number in your MIS, wait an hour then run the Schoolcomms import and then re-enable the contacts mobile number from the linked people screen.
Invalid email/mobile – The email address or mobile number stored in your MIS is in the wrong format. Most commonly too many digits.
Re-enabling Data Issues
Firstly, you must check with contacts that the information you have for them is correct before enabling any emails or numbers.
If the contact information is incorrect, please amend the contact’s MIS record wait an hour and run an import in Schoolcomms to bring over any changes.
If the contact information is correct, you can re-enable their email / mobile number from within Schoolcomms.
To do this:
- Go to Dashboard, School Members
- Search for the Student, click on the Student
- The Linked People window will open, click on the arrow at the end of the contact with a contact method missing
- Under Actions click on Re-enable read the warning and confirm that you want to re-enable the contact
- You will see that the contact method will revert to include the previously blocked contact method
- The email address or mobile number will be unblocked, and you can send messages to them again
Import data into Schoolcomms
Your import settings determine the contacts and data that are imported from your MIS database.
To review your Schoolcomms Import Settings go to Dashboard > Import Management > Edit settings.
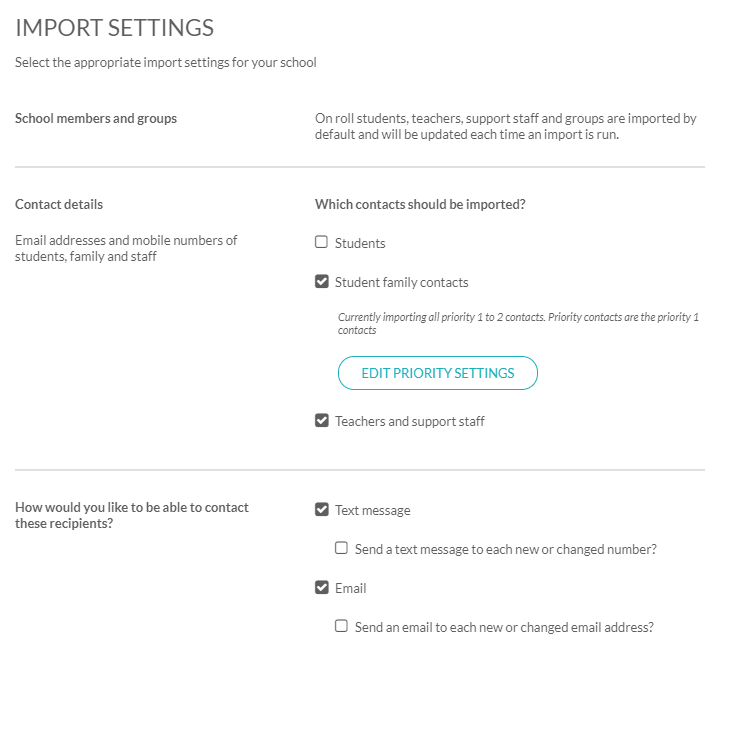
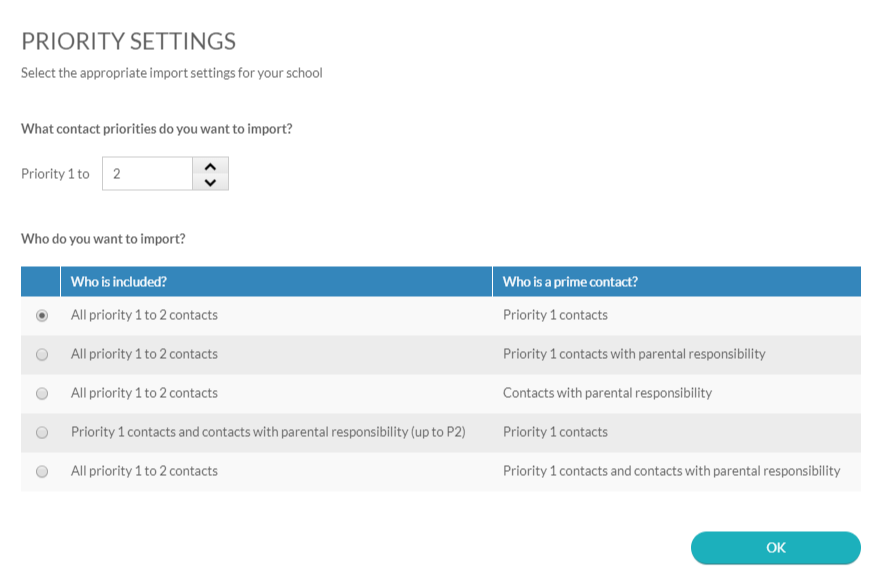
Select which contacts you would like to import from your MIS database. By default, the import is set to include Priority 1 parents and all are flagged as prime. If you wish to include other priorities and/or parental responsibility and set another choice for prime/non-prime, click on Edit Priority Settings.
Select whether you wish to import email address and/or mobile numbers.
Tick the Send a text/ email to each new or changed number/address if you do wish to notify each new contact. We advise that the ‘Send a Text message to each new or changed number?’ option is left un-ticked for your first import as this will send a text to each new contact you import and will use a large amount of your text credits.
Once you are happy with your chosen settings to import members, groups and contact details into Schoolcomms from your MIS click Save. You will now need to run an import, by clicking Run Import.
This data needs to be refreshed regularly to ensure it is up to date, so we advise you run an import every morning when you log in to Schoolcomms.
Deleting leavers
When should I delete leavers from Schoolcomms? – If a school member has left the school, they will be marked as a leaver the next time the import is run. Once you have saved any information/messages relating to these members, and you are certain that no payments or club bookings will need to be made by the parent(s), you can remove them from Schoolcomms using the delete leavers process.
How do I delete a leaver from Schoolcomms? – To delete leavers in Schoolcomms, click Management > Import Management. You will see Delete Leavers, select this option and highlight the members you want to delete in the left-hand box and select Add. Now click OK to confirm the members for deletion.
N.B. Deleting your leavers will permanently remove them from Schoolcomms. You will no longer be able to send messages to them and any association to your school will be removed from their School Gateway account. Before deleting your leavers, ensure you have saved any information/messages relating to them and performed any manual transactions/refunds as there will no way of recovering them once deleted from Schoolcomms. Any personal information which cannot be removed will be anonymised in 14 days, which will show as XXXX in your Schoolcomms report.
Note: When the delete leavers process is followed and you receive the success message, the leavers will be queued for deletion from our database, so you may continue to see members who are in the process of being deleted for a short period of time until they are removed (this timescale will depend on the number of leavers being deleted).
School Members and Groups
Adding a new school member that is not in your MIS
Sometimes you may need to contact people who don’t appear within your MIS database. To add them to Schoolcomms, follow the instructions below.
Click Management > Manage school members > Add member
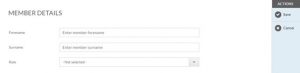
Enter the details for your new school member and click Save.
This member will be added to your list of members, but they will not have any contact details against them.
Click on Add Linked Person to add the contact details for this new member.
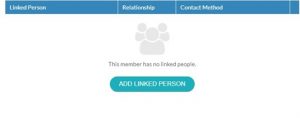
Add the relationship to the school member e.g., Prime Parent/Non-Prime Parent and choose if the parent has Parental Responsibility. Please note without Parental Responsibility they will be unable to give consent or book clubs.
Add the email address and mobile number and choose if you want to send a confirmation email or text to let them know. Click Save.
Editing an Existing Member
You can edit any members created in Schoolcomms by selecting the member then clicking Edit.
Deleting a Member
You can delete any member created in Schoolcomms by selecting the member then clicking Delete.
Note: The member will be permanently deleted and removed from the member list.
Adding a New Group into Schoolcomms
When you have added additional members to Schoolcomms, you may want to add them in to a group, so they are easily contactable. To do this, follow the instructions below.
Click Management > Add group
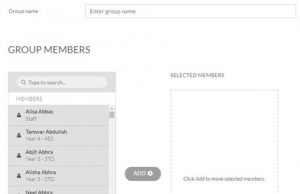
Enter a group name and the members to your group. Click Save
Your group will appear in your School groups list.
Edit/Delete an Existing Group
Any group that has been created in Schoolcomms can be edited or deleted under school groups.
Select the group you wish to edit/delete and click Edit to change the group or Delete to remove the group permanently from Schoolcomms.