Setup Guide
Installing Schoolcomms
Installation from the website
- Close SIMS if it is open
- If you are upgrading your Schoolcomms version you will need to uninstall any previous versions of Schoolcomms by going to Start, Control Panel, Add/Remove Programs
- Select Schoolcomms and click Remove
- Browse to www.schoolcomms.com/download
- Select Download
- Select Run to start the installation package
- Follow the step by step instructions
- Once the installation has finished double click on the Schoolcomms icon that has automatically been installed on your desktop
- For existing licence holders, select Log in for account holders
- Enter your login credentials and select Login
Installing via the windows installer (MSI) package
- To install the MSI package for Schoolcomms navigate to www.schoolcomms.com/download
- Under the title Alternative resources for Network wide deployment select the link entitled the latest Schoolcomms Windows Installer (MSI) package can be downloaded from here
Minimum requirements
- Supported operating systems include: Windows 10, Windows 8, Windows 7, Windows server 2008 (inc. R2) and Windows server 2012
- 3.0 GHz (single core) Intel Pentium-class processor
- 2048 megabytes (MB) of RAM or higher
- 30 MB of hard disk space required plus 500 MB headroom. More will be needed if the setup process needs to install Microsoft .NET 4
- 1024 x 768 or higher-resolution display with 24-bit colour
Logging in
Logging into Schoolcomms
- After installing Schoolcomms you should now have a Schoolcomms desktop icon
- Double click the icon Schoolcomms, If this isn’t the first the you have launched Schoolcomms on the machine skip to step 4
- A few options will appear, click on login for account holders
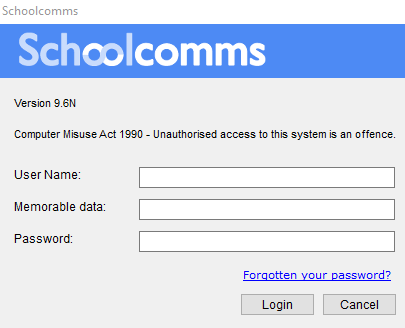
- The login screen will now appear
- You will be asked for your username, memorable data and password
- If you have forgotten your password please select the “forgotten your password?” Link. If you have a problem with your username or memorable data, please contact the support team or your school multi-user administrator if you have a premium licence.
Logging into Web Messenger
- The Web Messenger was designed to send out an emergency message from the school if for whatever reason Schoolcomms couldn’t be launched from the desktop. This version does not have all the functionality of the desktop version and is simply just to send messages. You can also access the payments area if you are Schoolcomms payments customers.
- Open up your web browser and go to schoolcomms.com
- In the top right hand corner will be a login button
- Click this button and the web messenger log in screen will load
- Enter your Schoolcomms login credentials and press login
Installing the SIMS Schoolcomms Plugin
View the guide here.
Running an import from SIMS into Schoolcomms
- If it is the first time you have logged in, before you can run the import, a window will appear asking you to choose your import settings.
- Your import settings determine the contacts and information that are imported from
- When entering contact details into SIMS, please note that section 4, Telephones and Email Addresses, is for the student’s contact information. Section 5 Family and Home is for parent’s contact details.
- To change your settings at a later date, go to Management > Import Management > Edit settings
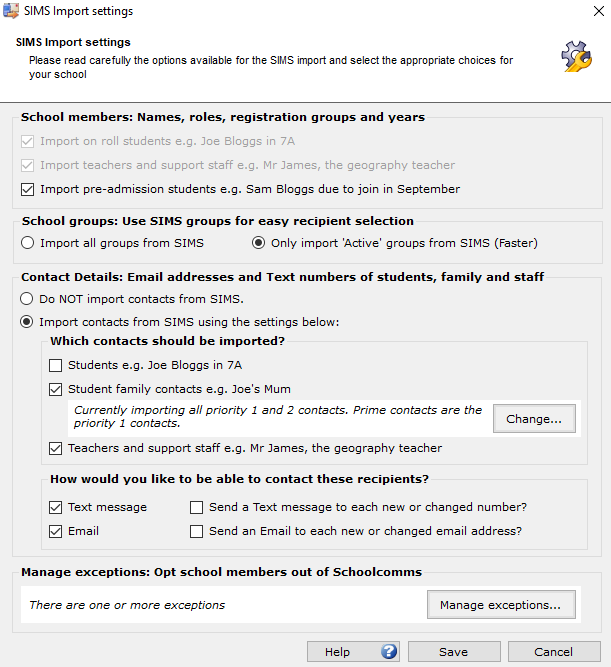
- Select the pre admissions tick box if you wish to send messages to this group
- Choose whether you wish to import All groups or just Active groups (faster)
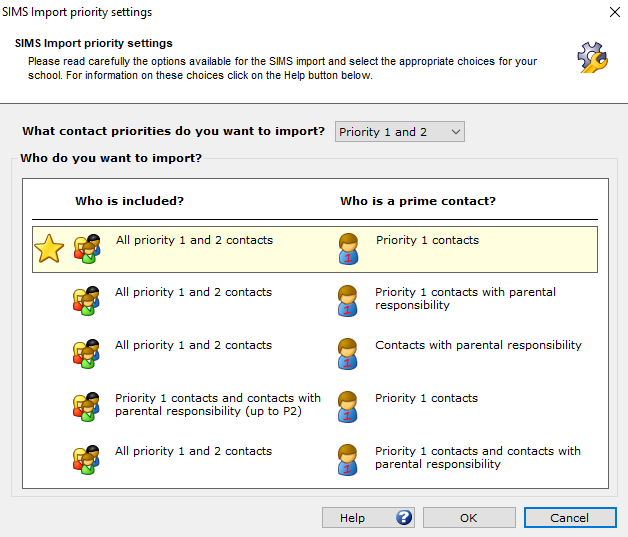
- Select to import contact details from SIMS and whose contact details you wish to import. By default, the import is set to include Priority 1 parents and all are flagged as prime. If you wish to include other priorities and/or parental responsibility and set another choice for prime/non-prime, click on Change.
- Select whether you wish to import email address and/or mobile numbers.
- Tick the Send a text/ email to each new or changed number/address if you do wish to notify each new contact. We advise that the ‘Send a Text message to each new or changed number?’ option is left unticked as this will send a text to each new or changed contact you import and this will use a large amount of text credits.
- Once you are happy with your chosen settings to import members, groups and contact details into Schoolcomms from SIMS you will need to run an import. This data needs to be refreshed regularly to ensure it is up to date.
- Each day when you first log into Schoolcomms, the import wizard will open automatically
- Select Run to run the import
- If you choose to run the import you will be asked to enter your SIMS login credentials
- Select Remember my SIMS credentials to avoid entering them each time
- Go to the Management screen and select Run Import to refresh your data manually at another time
- The import will be confirmed as successful when it has completed